It’s hot outside! The temperature is in the 90s, which means finding fun indoor activities is a must! Did you know the Little Woodhouse is also having a fun activity? We hope to see you there!

Two Leak-Proof Feeders, Zero Ants & Bees
Check PriceOur crafty mom, Courtney Grider, will show us how to create bird feeders using ice cream cones. Her daughter Harper will add some family fun to this activity.
Save this article for later so you don't lose it. Enter your email and I'll send it to you now—plus you'll get my favorite backyard birding tips delivered to your inbox.
If you want to do this project with your kids, you can start with crafting, or if you want to take it further, you can go birdwatching and make a whole event from it! What are we waiting for? Let’s dive into it!
What You’ll Need
- Ice cream cones
- Pipe cleaners
- Cheerios (optional)
- Whipped cream or icing (you can also use peanut butter)
- Bird seed
- Scissors
Using these straightforward materials, you can make an adorable bird feeder. You can make it by following these instructions or, if you’d prefer a video guide, you can watch the video.
Step 1: Preparing the Ice Cream Cones

To begin with, grab your ice cream cones and snap the tops off. This is the most important step because it lets you insert a pipe cleaner to make a handle.
After breaking off the tops, thread a pipe cleaner through the bottom of the cone and make a knot to keep it from slipping down. You don’t have to worry about the knot being super pretty it just has to hold.
Step 2: Adding Cheerios (Optional)

Set your bird feeder apart from the rest by adding some Cheerios at the top of your pipe cleaner to give it some pizazz! Thread some Cheerios into a circle or even a heart shape. This will look awesome and give the birds a little extra snack!
Once you’re done decorating, you can twist the pipe cleaner into a loop, or leave it open. It’s up to you!
Get our free Hummingbird Attraction Guide! Plus, we'll send you our best tips for attracting more birds to your yard.
Step 3: Coating the Cone with Whipped Cream or Icing

After that, take your whipped cream (or icing, or peanut butter if you prefer) and spread it all around the cone. This step can be a little messy, but that’s part of the fun!
Using a spatula (or your fingers), cover the whole surface of the cone. The whipped cream or icing will help the bird seed stick to the cone.
Step 4: Rolling the Cone in Bird Seed

When the cone is completely coated, it’s time to put on the birdseed! Pour the birdseed into a shallow container, and gently roll the cone in the birdseed.
Be sure to press down lightly so the seeds stick to the whipped cream or icing. Roll it again so that the entire cone is covered with birdseed.
Step 5: Letting the Feeder Dry
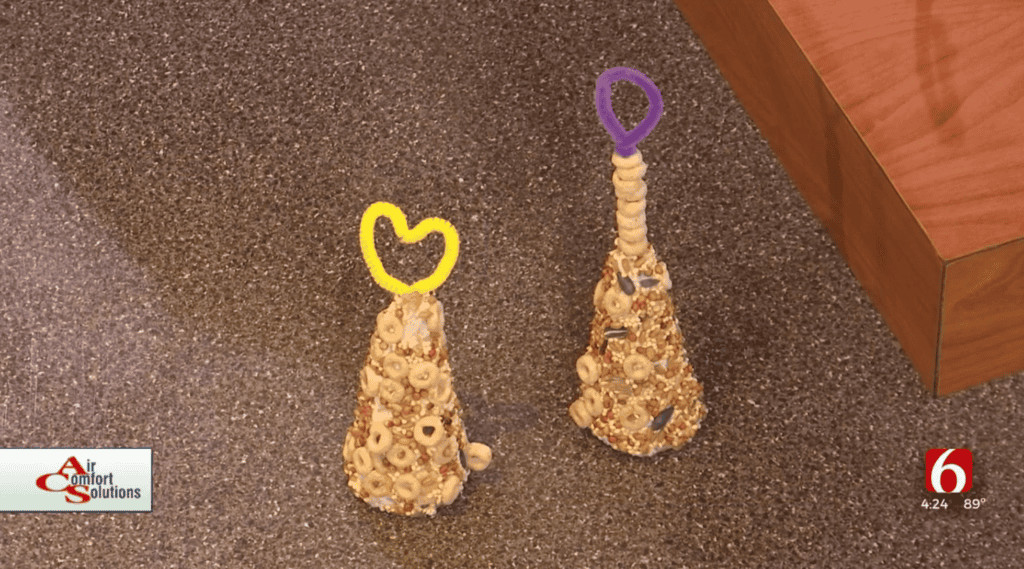
After coating your cone with birdseed, set it on a paper towel or a napkin to dry. It should take about 10 to 20 minutes to complete this process.
Allowing the feeder to dry will help keep seeds attached when you hang it outside.
Step 6: Hanging the Feeder
Once your bird feeder is dry, you can hang it outside. Pick a spot where birds are likely to visit it, like a tree branch or a hook in the garden.
Once you fasten the pipe cleaner loop to the preferred location, your ice cream cone bird feeder will be set to lure in some feathered friends!
Conclusion
There you go: a simple and quick bird feeder made from an ice cream cone that will keep your children engaged while helping the local birds!
Courtney and Harper enjoyed creating this project, and we hope you do as well. Enjoy crafting and birdwatching!
📷 Show us your feeder setup! Share a few photos of your feeders and you might be featured on Wild Bird Scoop. Share your setup →