
You put up a beautiful birdhouse, picked the perfect spot, and waited. And waited. Maybe a bird or two showed interest last year, but this season? Nothing. The problem probably isn’t where you hung it or what species you’re hoping to attract—it’s what you forgot to do last fall.
The Hidden Danger Lurking in Your Dirty Birdhouse
 1")
Save this article for later so you don't lose it. Enter your email and I'll send it to you now—plus you'll get my favorite backyard birding tips delivered to your inbox.
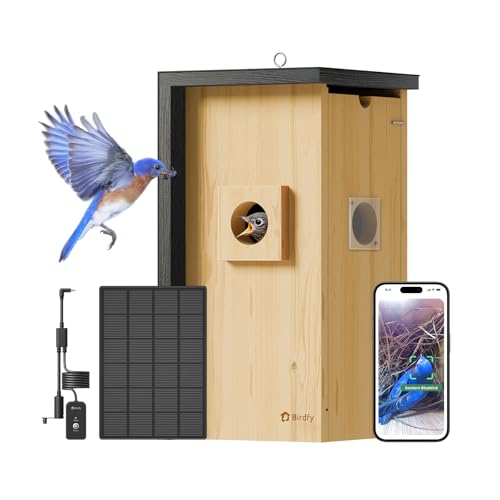
Birdfy Solar Powered Bird House with Camera
Check PriceHere’s the hard truth: birds avoid unclean birdhouses. If you left old nesting material inside from last season, you’ve essentially hung out a “Do Not Enter” sign for any bird looking for a safe place to raise their young.
Old nests aren’t just messy—they’re dangerous. They harbor parasites like mites and lice, which can infest new broods and weaken or even kill baby birds. Moisture trapped in decomposing nesting material creates the perfect environment for mold and bacteria to flourish. Birds instinctively know this. Their survival depends on finding clean, safe spaces to nest, and a birdhouse packed with last year’s debris doesn’t make the cut.
This is the number one reason backyard birdhouses sit empty year after year. It’s not that birds aren’t interested in nesting in your yard—it’s that they’re rejecting a home that feels unsafe. Many cavity-nesting species, including chickadees, bluebirds, wrens, and titmice, actively seek out fresh nesting sites. When they peek inside your birdhouse and find a mess, they move on to cleaner options.
The good news? This is completely fixable. Once you understand that regular cleaning is essential—not optional—you can transform your birdhouse from ignored real estate into prime nesting territory.
Why Fall Cleanup Matters More Than You Think
 2")
Timing is everything when it comes to birdhouse maintenance. The best time to clean out your birdhouse is in late fall, after nesting season has completely ended but before winter sets in.
Why fall? Because it gives you a clean slate for the next breeding season, which begins earlier than most people realize. Many birds start scouting for nesting sites in late winter or early spring, long before they actually lay eggs. Bluebirds, for example, may begin checking out potential homes as early as February or March in many regions. If your birdhouse is still packed with old nesting material, they’ll cross it off their list immediately.
Fall cleaning also prevents the buildup of debris and pathogens over winter. Snow, rain, and freezing temperatures can turn an uncleaned nest into a compressed, moldy mess that’s even harder to remove come spring. By tackling the job in autumn, you’re giving yourself—and future bird tenants—a much easier start to the new year.
There’s another benefit to fall cleaning: it helps you assess the condition of your birdhouse. You can check for damage, loose screws, or weathering that needs attention. Addressing these issues in the off-season means your birdhouse will be structurally sound and ready when birds start house-hunting.
Some birders worry about disturbing birds by cleaning too early, but as long as you wait until nesting season is truly over—typically late September through October in most of North America—you’re in the clear. If you’re uncertain, a quick peek inside will tell you if the house is vacant.
Get our free Hummingbird Attraction Guide! Plus, we'll send you our best tips for attracting more birds to your yard.
Step-by-Step Guide to Cleaning Your Birdhouse Right
 3")
Cleaning a birdhouse isn’t complicated, but doing it correctly protects both you and future bird residents. Here’s exactly how to do it:
Step 1: Gather your supplies. You’ll need gloves (to protect your hands from parasites and droppings), a scraper or putty knife, a stiff brush, mild dish soap or a diluted bleach solution (one part bleach to nine parts water), and access to a hose or bucket of water for rinsing.
Step 2: Remove the old nest. Open the birdhouse—most designs have a side, front, or bottom panel that opens for cleaning. Wearing gloves, pull out all the old nesting material. This might include twigs, grass, feathers, moss, and droppings. Dispose of it in a trash bag rather than composting it, since it may contain parasites.
Step 3: Scrape and scrub. Use your scraper to remove any stuck-on debris, then scrub the interior with your brush and cleaning solution. Pay special attention to corners and the floor, where mites often hide. If you’re using a bleach solution, it’s highly effective at killing pathogens, but dish soap and hot water work well for regular maintenance cleaning.
Step 4: Rinse thoroughly. This step is crucial. Rinse the birdhouse completely with clean water to remove all soap or bleach residue. Any chemical remnants could be harmful to birds.
Step 5: Dry completely. Leave the birdhouse open and let it air-dry in the sun for several hours or even a full day. Proper drying prevents mold from developing before the next nesting season.
Step 6: Reassemble and rehang. Once dry, close up the birdhouse and return it to its spot. It’s now ready for next season’s residents.
If you’re dealing with a particularly stubborn or heavily soiled birdhouse, don’t hesitate to give it a more intensive cleaning. The effort you put in now directly translates to healthier, safer nesting conditions later.
Bonus Fixes to Pair with Cleaning for Birdhouse Success
 4")
While cleaning is the most important maintenance task, combining it with a few other smart strategies will dramatically increase your chances of attracting nesting birds.
Check your placement. Even a spotless birdhouse won’t attract tenants if it’s in the wrong spot. Mount your birdhouse at least five feet off the ground, away from areas where predators like cats can easily reach. Position it so the entrance hole faces away from prevailing winds and harsh afternoon sun. A little morning sun is fine, but too much heat can make the interior dangerously hot for baby birds.
Consider the entrance hole size. Different bird species need different hole sizes. Chickadees and wrens prefer 1⅛-inch holes, while bluebirds need 1½ inches. If the hole is too large, it invites larger, more aggressive species or predators. If it’s too small, your target species can’t get in.
Do seasonal checks. Even if you cleaned in fall, it’s worth doing a quick inspection in early spring. Sometimes insects move in over winter, or weather causes damage. A five-minute check ensures everything is still in good shape.
Remove competing nest builders. House sparrows and European starlings—both invasive species—will aggressively take over birdhouses meant for native birds. If you notice them building nests, it’s okay to remove their nesting material (they’re not protected by the Migratory Bird Treaty Act). This gives native species a fighting chance.
Provide nearby resources. Birds want food, water, and cover close to their nesting site. Adding a birdbath, planting native shrubs, or putting up feeders nearby makes your yard more attractive overall.
With a clean birdhouse and these simple adjustments, you’re creating an environment where birds feel safe, comfortable, and eager to raise their families. The transformation can happen quickly—often within the same season.
Your birdhouse isn’t broken. It just needed a little care. Give it a thorough cleaning this fall, and you might be surprised how quickly it becomes the most sought-after address in your backyard. Happy birding!